During a recent Airstream caravan through west Texas, we quickly discovered what it meant to be without internet (or cell coverage) for days on end.
So, we decided that for our upcoming journey to Alaska, we would bite the bullet and invest in a Starlink system. It did help that a number of our fellow west Texas caravaners already had Starlink and “convinced” us of its value.
As much as we enjoy being unplugged while RVing, it is still nice to be able to occassionally check email, write blog posts, stream a movie on a rainy day or even make a phone call while traveling about. Let’s face it……it really is hard to be totally unplugged. And, without cell service, you are out of luck!
So, this post will explain the steps I took to install the Starlink system into our Airstream and provide a list of the items needed to do so.
Things to Consider
- How do you want to mount the dish to your RV?
- Where will the router be located?
- How often will you set up the dish?
- How do you want the wiring to enter your airstream?
- How are you going to store your dish and where?

Where to Mount the Dish?….How Often Will You Set it Up?
In order to decide where you will mount the Starlink Dish, you need to think through the following:
- The physical structure of your RV and how permanent you want the mounting base to be attached to it.
- Is there an easy mounting location (such as an attached ladder as found in large motorhomes/5th wheels?
- Are you comfortable attaching mounting brackets to your rig?
- Do you want flexibility in moving your dish around at a campsite? (ie, avoid trees and other obstacles.)
- Do you plan on staying at locations for long periods of time or do you move frequently?
My solution:
- I did not want to mount anything to the Airstream skin nor did I want to use any sort of suction cup/adhesive solution for mounting on a window.
- Since we move often, I needed to be able to setup/take down the mount quickly
- We love camping in wooded areas (State Parks, etc) and need to be able to move the dish around to avoid trees, nearby campers
- To minimize potential theft, I wanted the dish up high
Therefore, I decided to mount the dish on a pole attached to the A-frame of the tongue:
I found a bolt-on hitch receiver and a flag pole mount made for hitch receivers. The hitch receiver stays permanently mounted on the frame and the pole mount can be quickly inserted and removed.
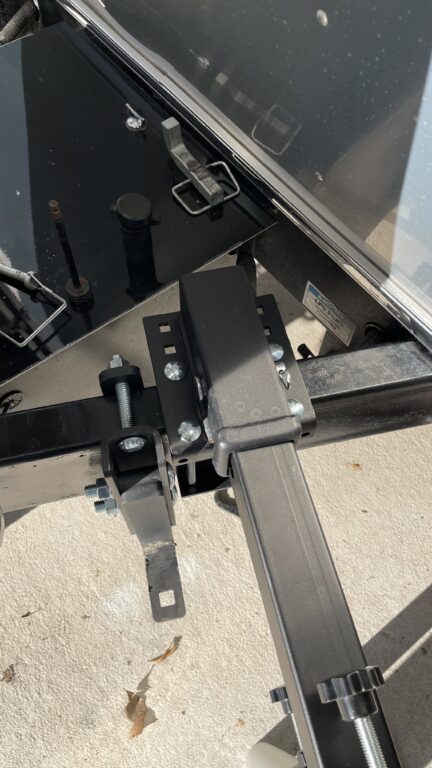
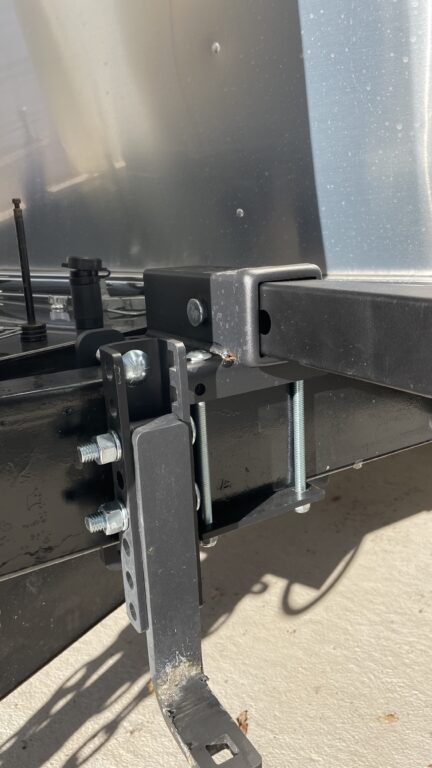
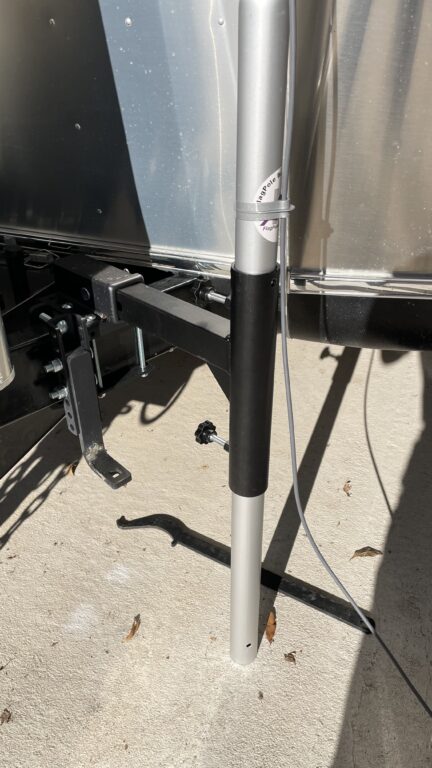
Here is where you can purchase these items:
Amazon: Bolt-on Hitch Receiver
Amazon: Hitch Flag Pole Holder
Where Are You Locating the Router?
This might seem like an easy question to answer…..inside of course! However, remember that there is a communication line from the dish to the router. So, if the router is inside the camper, you need to either run the line through a window, through an outside compartment, door, battery box, etc. In doing so, you may have to leave those openings partially open so as not to crush the communication line.
Other things to consider include:
- leaving doors/windows ajar could allow insects, rain, etc into your camper
- will you have to disconnect everything at night in order to secure your camper?
- how much time and effort will it take to run the communication line every time you set up/take down the dish?
- what do you do during the day when you are away from your camper exploring, hiking, shopping etc.?
You could also leave the router outside in a weather-proof container; especially if you are connecting to the router via, wi-fi. However, you’ll still need to provide power to the router and if your camper does not have an outlet on the outside, then you will still need to run an extension cord from the inside.
Other things to consider include:
- theft – it would be easy for someone to walk away with the router
- the weather-proof container will need to allow for the power cord and the communication line to enter
- where are you going to put the weather-proof container? under the camper? on the ground?
- will the outside electrical outlet be near where you would like to put the weather-proof container?
- do you leave it all outside when you are away from the camper?
- how long is it going to take to hook everything up?
My Solution:
I decided to place the router inside, protected from the weather and from potential theft. This might seem daunting since now you have to figure out how to get the communication line from outside to inside the camper. But, with a little bit of effort and creativity, it can certainly be done. Here are some things to think about as you find the ideal location inside your camper:
- where and how do you plan on bringing the communication line into the camper (see the next section)?
- can you position the router close to where the communication wire will enter the camper?
- how close will the router be to the nearest electrical outlet?
- do you want to hide the router in a cabinet or have it on a table or countertop?
- how will you secure the router while traveling?
I was able to find space under the arm rest of the couch where it would be hidden, secure and easy to plug in.
Even though, it was going to be about 12 ft from where the communication line would come in from the outside, I was able to map out a way to run the wire to the router and stay hidden.
There is an electrical outlet nearby; so, it is easy to plug it in when the arm rest front cover is in place.
Additionally, I built a small shelf inside the area so that I could still store stuff under it……as you know, every little bit of storage helps!
Finally, I found a mount to securely hold the router during travel
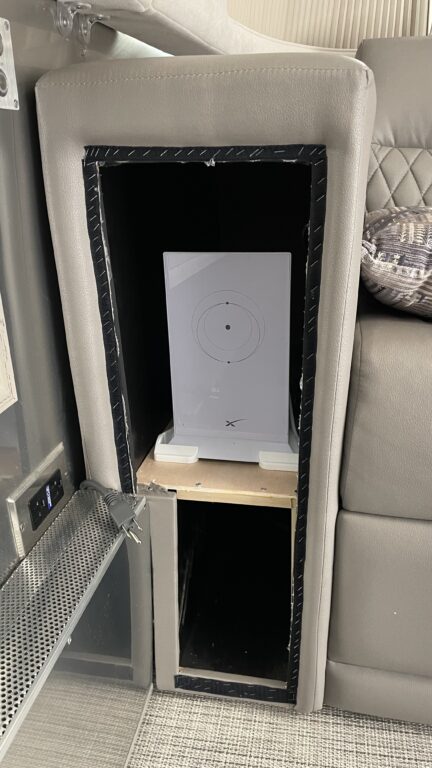
Here is where you can purchase the router mounting base: Flagpole Buddy
How Am I Going to Get the Communication Line Into the Camper?
As discussed above, there are several ways you can get the communication line (ie, the cable from the dish to the router) into your camper:
- through a window
- through a door
- through an outside storage compartment
- through some sort of permanent outdoor plug
Each solution has pros/cons and really depends upon how often you will setup/take down the dish, safety concerns, weather concerns and how comfortable you are mounting a permanent outlet on the outside of your rig.
My Solution:
I decided that I wanted to be able to quickly plug the communication cable from the dish into an outlet on the outside of the rig. This approach makes it easy to setup and take down the dish, does not require us to leave any door, window or outside storage compartment open and has a clean look.
This solution took 3 steps:
- Cut the Starlink cable and attached RJ45 male plugs on each cut end
- Install exterior connector jack
- Run the cable on the inside of the camper to the router
Step #1 – Cut the Starlink Cable and attach the RJ 45 male plugs
You will need to be comfortable cutting the Starlink communication cable and attaching new RJ45 plugs on each of the cut ends. RJ45 plugs look like a telephone plug or the plugs which go into a computer router.

Attaching these plugs to the cable is not difficult; just takes time, a special tool and a little patience. I recommend using pass-through plugs and there are plenty of YouTube videos which explain exactly how to do it.
Here is one I recommend: Cutting the Cord
You can get the special tool on Amazon: trueCABLE
You will also want to get Shielded male plugs: Shielded RJ45 Plugs
I was able to use the standard length cable which came with the Starlink dish. Simply determine how much cable you need from the antenna to the location on the outside of your camper where you intend to plug it in. Then cut it and install a male RJ 45 plug.
Step #2 – Install the exterior connector jack
I replaced the original exterior cable TV outlet that was installed on our Airstream with one from SmartPlug. I did not have to drill any holes into the side of the Airstream because the SmartPlug mounting holes were in the same exact location as the original outlet. This outlet comes with both an Ethernet Plug (for cable TV) and the RJ45 outlet. When you remove your old exterior outlet, you will be able to unscrew the Cable TV cable on the back and then screw it onto the back of the new SmartPlug outlet.
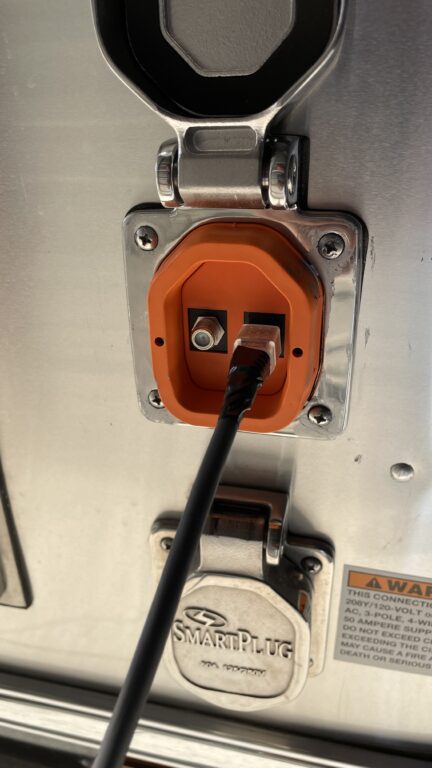
Step #3 – Run the cable on the inside of the camper
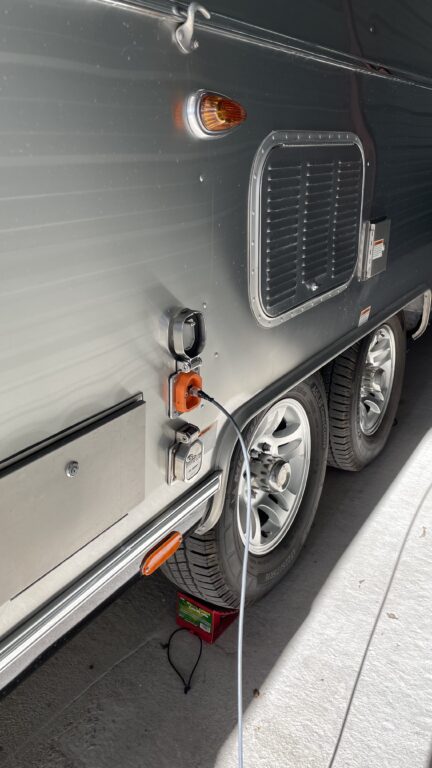
At this stage, you do not want to tighten the SmartPlug outlet to the outside of the camper, because you will want to go inside and route your wire from the Starlink router to the back of the new SmartPlug outlet. Depending upon where and how you route the wire inside the camper will determine whether or not you can put the RJ45 male plug on the cable end before or after you run the wire. I was able to put the RJ45 plug on first and then route the wire. After you route the wire and it is close to the back of the SmartPlug, you should be able to go outside, loosen the new SmartPlug from the camper wall and plug the inside wire into the back of the SmartPlug. Then you can finalize the SmartPlug installation by tightening the 4 screws until the SmartPlug is snug against the camper’s outside wall.
You can purchase a SmartPlug here: SmartPlug
How Are You Going to Store Everything?
As RVers, we are always on the lookout for space saving ideas and/or using items which can serve multiple purposes. So, now you have a Starlink Dish, pole, cabling and router to figure out what to do with. Assuming your router is going to be stored inside your RV, you have that one taken care of.
But, now the rest of it…….
For that, I consulted with YouTube and the various forums (Starlink, Airstream) and discovered that others had already come up with some great solutions. And, since we have an Airstream with limited external storage, I knew that it all needed to go into the already crowed back of my pickup truck.
My Solution:
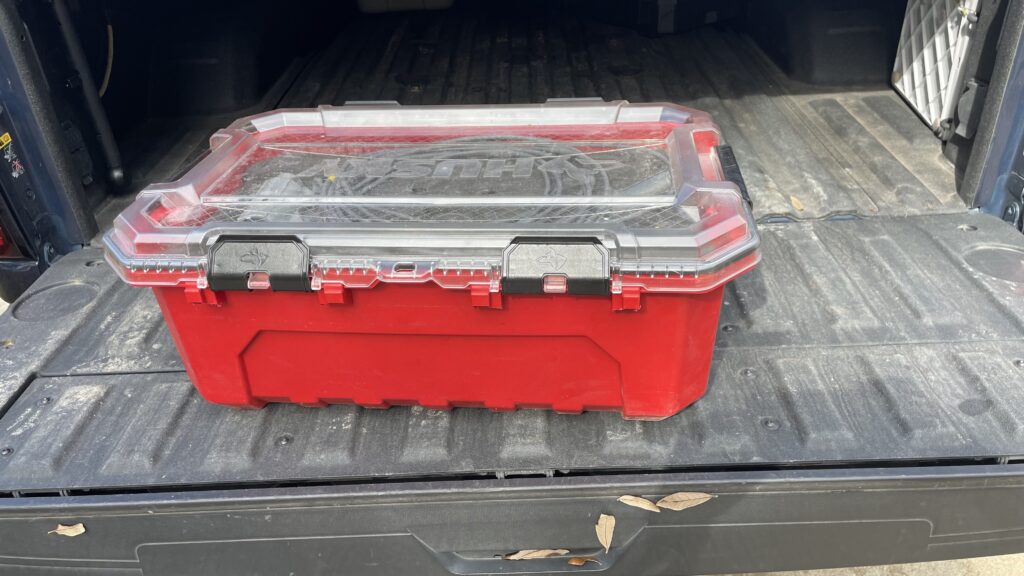
This Husky Box is the perfect fit for the dish and the cable. It is relatively inexpensive, but strong and watertight. Plus, a creative and innovated guy designed and fabricates a custom, laser-cut, foam insert to fully protect the dish inside.
The box fits nicely in the back of the truck and with the rugged box, there are no worries in getting the dish banged up.
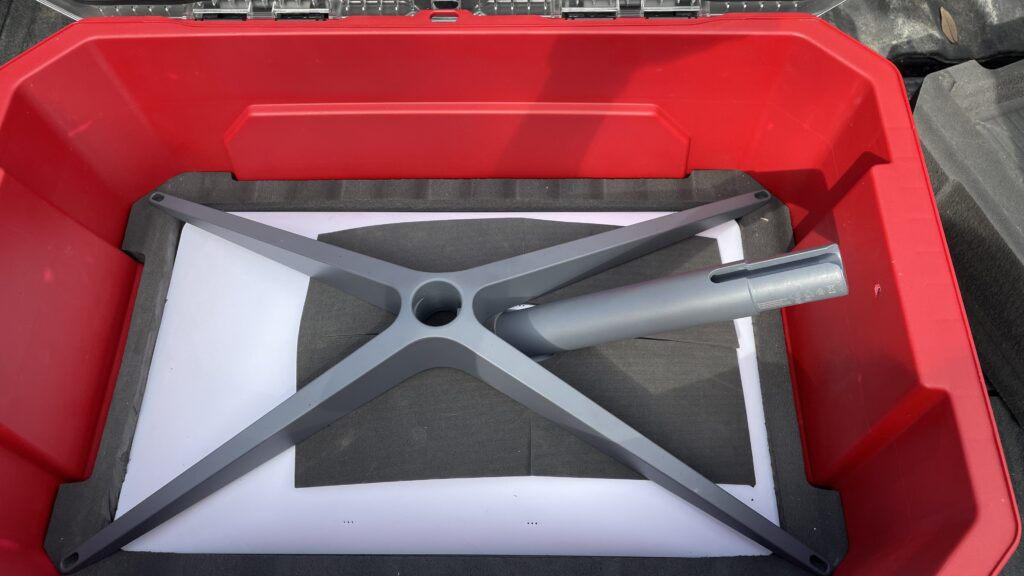
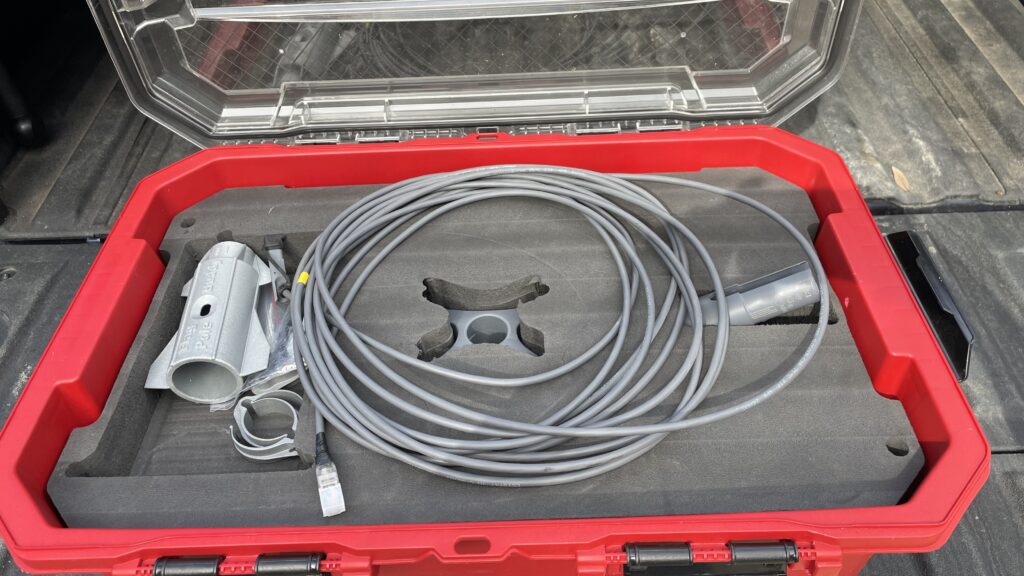
The pole is a 16′ aluminum pole which brakes down into four sections. These fit nicely in a carry bag and again gets tucked away in the back of the pickup.

Here is where you can purchase these items:
Husky Storage Box – Home Depot
Custom Foam Insert – Tire-Spine
Pole and Carry Bag – Flag Pole Buddy
