

Keep Your Airstream’s Ticker Healthy
Your Airstream batteries are its heart and central to all operations! The jack, lights, furnace blower, refrigerator, water pump and depending upon your model, many other features require healthy batteries to reliably operate. So, it is important to keep them well maintained.
Most of us never give our batteries a thought until they stop working, and of course that happens when we least expect it. Many newer models have Lithium batteries, but plenty of Airstreams still have AGM lead-acid batteries, which need the annual care described below.
You can help ensure the batteries operate properly and extend their life by simply cleaning the battery terminals and making sure all the connections are tight. And you can do this in your driveway, garage or storage unit.
Before you get started, make sure you do the following:
- Ensure everything in your Airstream is turned off
- Unplug the shore power
- Locate the battery disconnect switch and set it to the “off/store” position so that the electrical system is disconnected from the batteries.
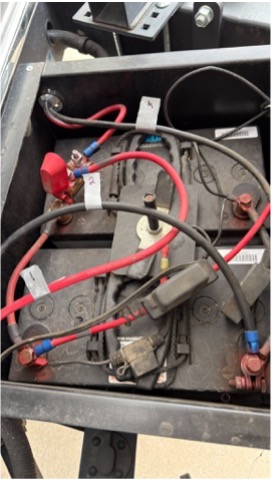
- Most battery boxes have a hinged lid. Use duct tape to hold the lid open so it does not fall on you while you work on the batteries.
- Next, take a picture of the batteries. Then label each wire with tape and number them (1, 2, 3, etc.). Don’t worry about which wire gets which number; the labels and photo are simply a reference, so you know where each wire goes after you clean the terminals.
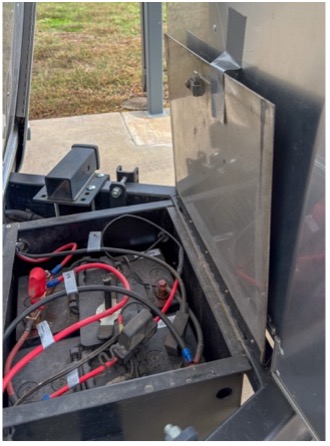
3. While wearing safety glasses and gloves, loosen the nuts on the negative (-) terminals first. These terminals have black wires attached. Remove the black wires from the negative (-) terminals and make sure neither they nor you touch the positive (+) terminals with the red wires attached.
Note: Disconnecting the negative terminal first reduces the risk of a short circuit if your wrench accidentally touches grounded metal while working on the positive terminals in the next step.
Pro tip: As you remove each wire, wrap its exposed end with electrical tape so it cannot accidentally touch a terminal or other metal
4. Now, loosen the nuts on the positive (+) terminals and remove the red wires. Likewise, do not allow the removed red wires to touch the negative (-) terminals.
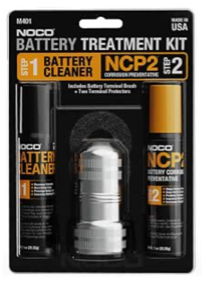
With all the wires disconnected, clean the battery posts, wipe off the batteries, and clean the round connector on the end of each wire. Handle these wires freely, since they are no longer attached to the battery. I recommend a battery cleaning kit (about $15) that includes terminal cleaning spray, a small wire brush and anti-corrosion spray. You can buy one at a local auto parts store or on Amazon.
5. After cleaning, look at the photo you took in step #2 and reattach the wires to the battery posts. First reattach the red wires to the positive (+) terminals. Make sure the nuts are tight; but don’t overtighten them.
6. Now, looking at the photo you took in step #2, reattach the black wires to the negative (-) terminals. Again, do not overtighten the terminal nuts.
7. Using your photo, double check that all the connections are correct
8. Finally, spray each of the battery terminals with the anti-corrosion spray.
9. You can now turn on the battery disconnect switch to allow the batteries to power the system.
Congrats, you have successfully cleaned the batteries and helped extend their life and performance! Repeat this care once a year, and your Airstream’s ticker will be ready when you are.